


Reverse engineer the WordPress database with RDA
I was evaluating some enterprise data modelling tools when I realized that one of them, the new version 7.01 of Rational Data Architect (RDA), now supports MySQL. Simultaneous, I was working on a personal project trying to analyse the WordPress database, that relies on MySQL, in order to understand how does it works. So I decided to combine both projects and try to reverse engineer the MySQL WordPress database with RDA to obtain the WordPress data model.
Based on this experience, I wrote a short tutorial for beginners that explains how you can reverse engineer a MySQL database with RDA. I didn’t intend to cover all aspects of the product, that is the job of the reference manuals. And if you want to go deeper in the Rational Data Architect functionalities, at the bottom of this article you can also find some references.
So, here it is the tutorial as well as my conclusion. Hope you find it useful.
Prerequisites
- A WordPress installation configured and running (so I assume that you have also a MySQL instance running). In this tutorial we are going to use a wordpress 2.07 database and MySQL 5.0 (despite RDA only supports up to version 4.1).
- Rational Data Architect V7.01. If you don’t have a license and you are just evaluating the product, you can download a trial. RDA can be installed on top of an existing Eclipse 3.2 environment or will install its own Eclipse 3.2 instance.
- A MySQL jdbc driver. You can use the official MySQL Connector/J.
Creating a new data design project
A data design project is primarily used to store modelling objects, including logical and physical data models, DDL scripts, mapping models, and more. To create a data design project:
- On the main menu bar, select File > New > Project. Or, you could right-click in any blank space in the Package Explorer (if you are using the RDA plugin on Eclipse) or in the Data Project Explorer (if you are using RDA with the Eclipse bundled on it) and select New > Project. The New Project wizard opens.
- Select Data Design Project, under the Data folder.
- Name the Project WordPress and select Finish.
Creating a new physical data model:
A physical data model (PDM) is a database-specific model that represents relational data objects, such as tables, columns, primary and foreign keys. A PDM can be used to generate DDL statements that can then be deployed to a database server.
You can use the New Physical Data Model wizard to create a physical data model:
- Select File > New > Physical Data Model from the main menu file. The New Physical Data Model wizard opens.
- On the first page of the wizard, change the file name of the model to WordPress PDM, the selected database to MySQL, the selected version to 4.1, and check the Create from reverse engineering check box. Then select Next.

- On the second page, note the Create a new connection is checked. Leave that as it is and select Next.
- On the third panel, specify:
- Database: The name of the WordPress database, in this case wordpress
- JDBC driver class: com.mysql.jdbc.Driver
- Class location: Browse to the location of the MySQL jdbc driver file mysql-connector-java-5.0.4-bin.jar
- Connection url: jdbc:mysql://host:port/, where host is the name of the system where MySQL is installed, in this case localhost, and port is the database server port that the MySQL instance is using to listen to communications from remote clients, in this case 3306
- User and Password: type your user ID and password
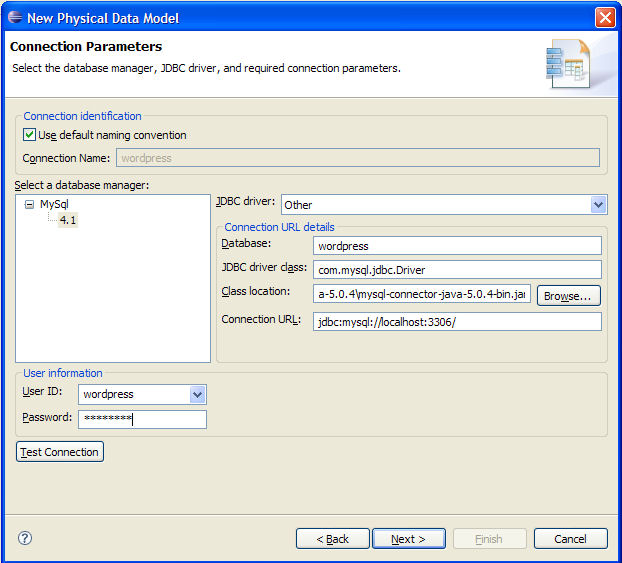
- Select Test Connection and if the connection is successful then select Next.
- On the fourth panel, select the wordpress schema to reverse engineer and then select Next.
- On the fifth, select the database elements to reverse engineer and then select Next.
- On the sixth panel, check the Generate Overview diagram option and then select Next.
- Select Finish.
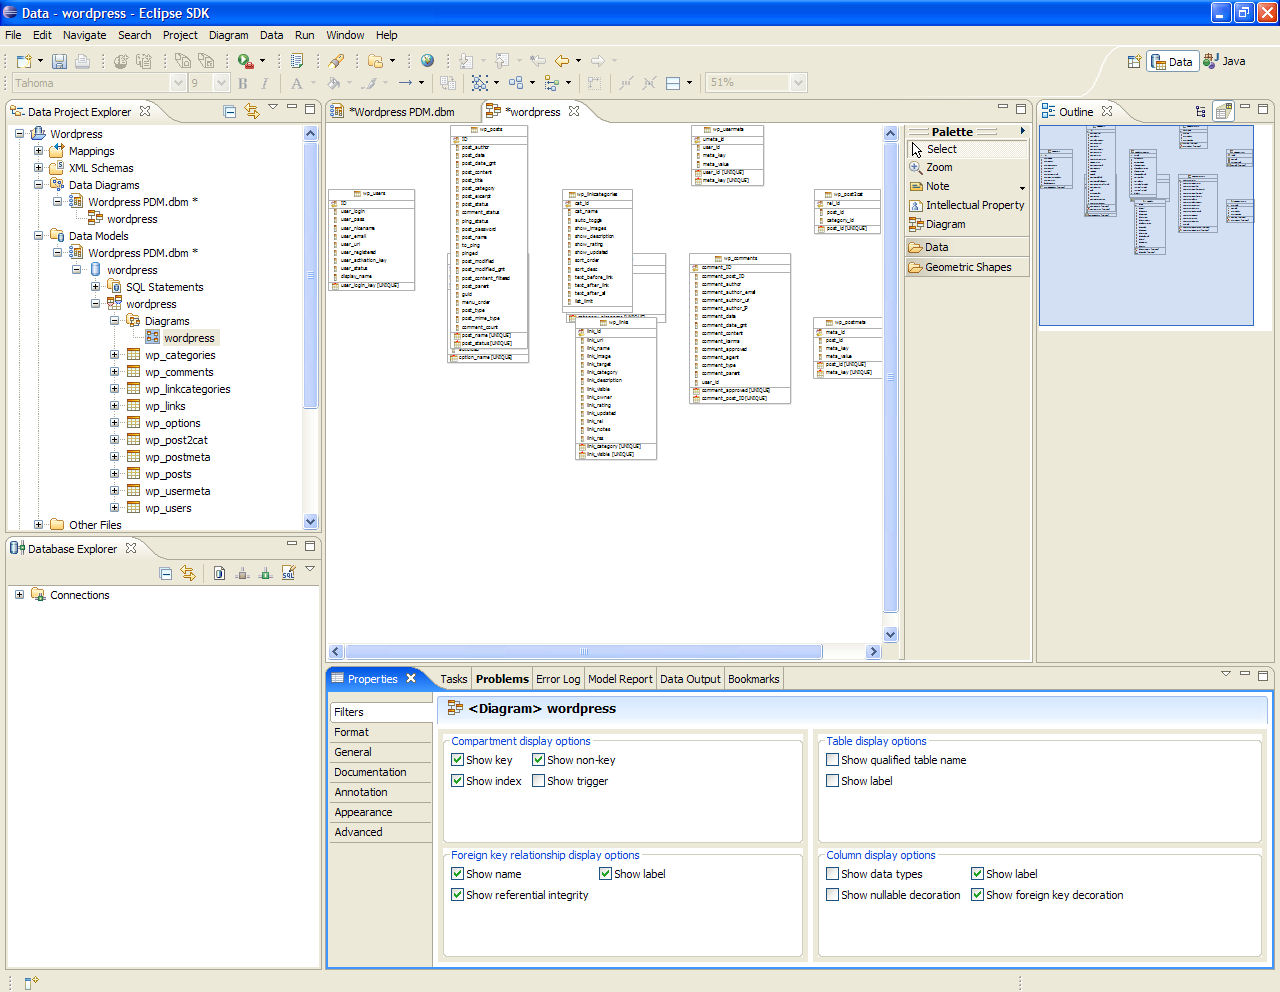
The PDM is created and displayed in the Data Models folder under the WordPress data design project (this model has a .dbm extension to represent physical data model).
If you expand WordPress PDM.dbm and wordpress schema, you will see the database elements we have reverse engineer. Double-click the wordpress diagram, in the Diagrams folder under the wordpress schema, to see the new generated diagram. In the properties tab, you can change the elements that must appear in the diagram.
Creating the foreign key relationships
As wordpress database doesn’t use foreign keys, we must create them manually in order to see relationships between tables. To create a foreign key relationship from a parent table to a child parent table in a physical data model diagram:
- Select a type of relationship in the palette.
- Select the parent table that has the primary key
- Drag to the child table. Depending on the type of relationship you are creating, a pop up window might open asking you to specify relationship options.
Be aware that the key from the parent table is migrated to the child table. As wordpress doesn’t use a similar name on the child table, we must delete this new field at the child table and assign manually the relation between the primary key at the parent table and the foreign key at the child table.
- In the Data Project Explorer view, select the WordPress PDM model and then the wordpress schema.
- Select the child table to modify.
- Select the Foreign key relation to modify.
- Select Details under the Properties tab.
- Select the appropriate column in the child table.
- Delete the generated column in the child table.

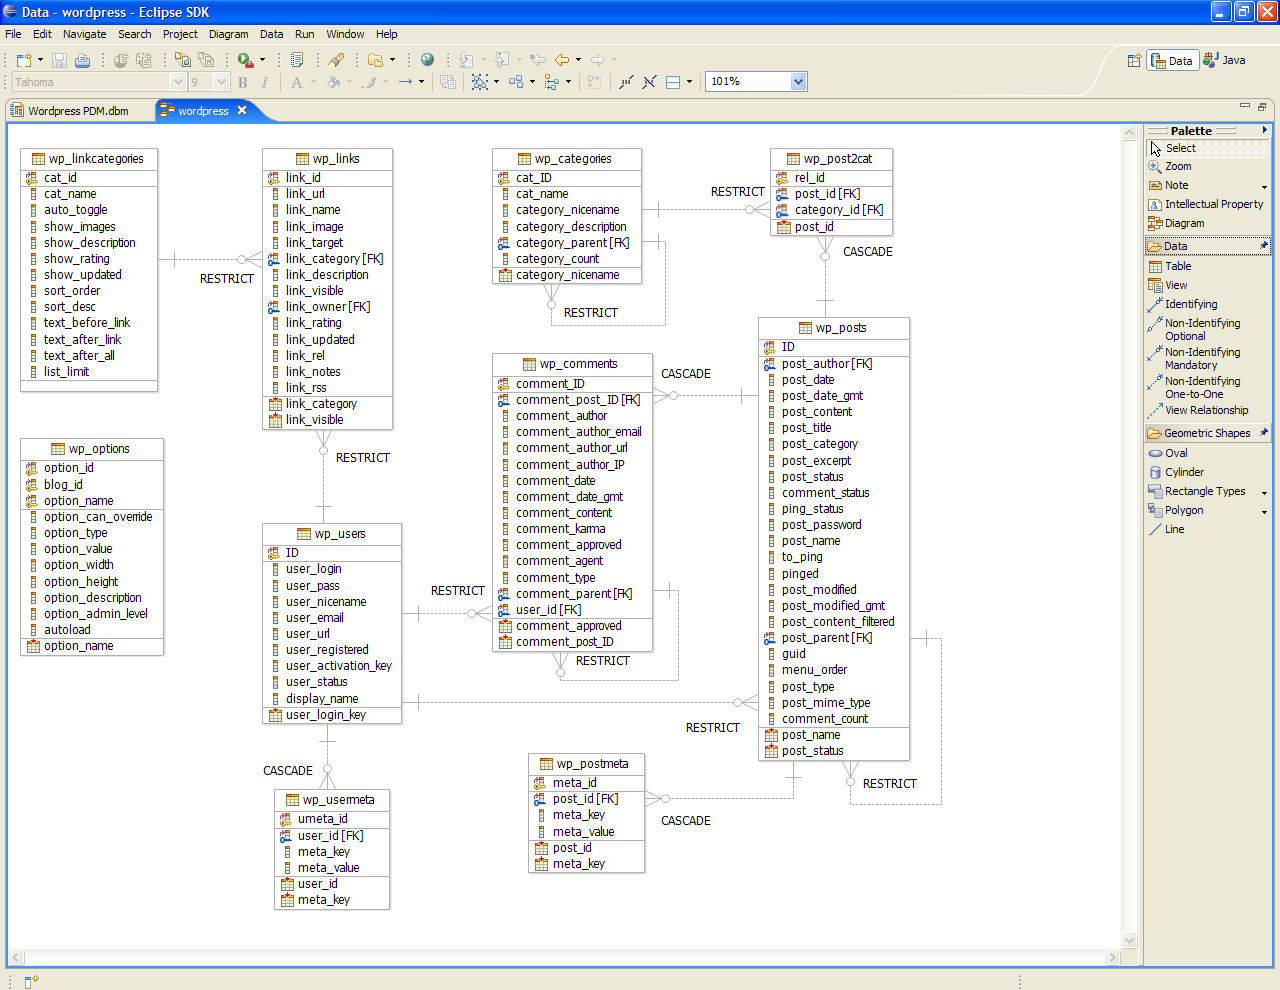
So in order to establish all relations, we must create manually the following relationships:
- wp_linkcategories[cat_id] -> wp_links[link_category]
- wp_categories[cat_ID] -> wp_post2cat[category_id]
- wp_categories[cat_ID] -> wp_categories[category_parent]
- wp_posts[ID] -> wp_post2cat[post_id]
- wp_posts[ID] -> wp_comments[comment_post_ID]
- wp_posts[ID] -> wp_posts[post_parent]
- wp_posts[ID] -> wp_postmeta[post_id]
- wp_comments[comment_ID] -> wp_comments[comment_parent]
- wp_users[ID] -> wp_links[link_owner]
- wp_users[ID] -> wp_posts[post_author]
- wp_users[ID] -> wp_comments[user_id]
- wp_users[ID] -> wp_usermeta[user_id]
And you will get this final diagram:
You can also define the referential integrity constrains, but this is not the object of this tutorial.
Publishing the data model
Finally, you can publish the data model outside of the modelling tool, as an HTML page or as a PDF file. To create a PDF report:
- In the Data Project Explorer view, select the WordPress PDM model to on which to create a report.
- On the main menu bar, select Data > Publish > Report.
- In the Generate Report window, select the Diagram Report for Physical Data Model. Each row contains information on the type of file to be generated, the name of the report, and a description.
- Type an output file name in the Select the file name for the generated report field.
- Select OK to publish the model report.
Summary
In this tutorial you learned how to create a new physical data model and reverse engineer an existing MySQL database. You created a foreign key relationship from a parent table to a child parent table, and you modified the columns involved in the relationship. Finally, you published the data model outside of the modelling tool, as a PDF file.
My opinion
Rational Data Architect supports lots of relational data sources (Cloudscape, DB2 Universal Database (UDB), DB2 UDB iSeries, DB2 UDB zSeries, Derby, Informix, MySql, Oracle, Microsoft® SQL Server and Sybase), and that it’s great.
You can work in the Logical model or in the Physical model separately, and you have the ability to transform a Logical model to a Physical model or vice versa. This sounds good, as you can differentiate roles but reusing the previous work: analysts designs the application, the logical model, and developers could implement the physical model based on the target DBMS reusing the work done by the analyst. The only problem is that both models are not synchronized, so if the analyst changes an entity in the logical model, it is not propagated to the physical model, and this could be a mess.
It’s very easy to reverse engineer a database, as I have show you in this tutorial. The biggest concern about obtaining a data model through reverse engineering is discovering relationships. This is a hard work, as many apps database designs doesn’t use foreign keys (as WordPress) and they don’t tend to normalize column names. RDA has a discover function that can help you find the matching elements automatically so that you don’t have to specify them manually. I need to check deeper this functionality, but I don’t have a hope that it will succeed completely, as there are lots of relations that rely on the code, not in the database.
It will be very useful that when you create a new relation between two entities/tables, you could also specify the child column. In the tutorial example, I had to delete the new field created automatically at the child table and to assign manually the relation between the primary key at the parent table and the foreign key at the child table. In my opinion, this steps can be avoided if you let specify which is the target child column.
RDA can be installed on top of an existing Eclipse 3.2 environment or will install its own Eclipse 3.2 instance. I didn’t find any list of plug-in dependencies in the installation guide, so I tried to install RDA on top of my existing Eclipse 3.2 (Birt, CDT, DTP, PHP, TPTP and WTP). The plug-in worked fine, except some few functionalities as the report generation and the XML Schema Validator. This is a problem that I have had with lots of Eclipse plug-ins. If you don’t want to deal with plug-in dependencies problems, my recommendation is to install RDA with its own Eclipse instance.
I have also found some bugs:
- You can not specify a precision for the BIGINT numerical type, despite you can specify it in MySQL.
- RDA doesn’t support the MySQL ENUM type. Enum is not a SQL standard (you must create a separate table that maps different values or use a check restriction), but if the RDA brochure says it supports MySQL then it must support the ENUM type.
- With the previous problem in the physical model, RDA doesn’t generate DDL, despite there isn’t any error in the Problems tabs and no message appeared in the Generate DDL wizard. This problem drives me crazy, until I found the problem. It will be very useful to have a validation utility.
Despite these bugs, Rational Data Architect made a very good impression on me.
References
- “Use Rational Data Architect to define and enforce data object naming standards” (developerWorks, Jan. 2007) examines the features of IBM Rational Data Architect that enable users to define and implement object naming standards, and then demonstrates with a real-world example.
- RDA skills series at developerWorks:
- “Rational Data Architect skills series, Part 3: Discover schema relationships with Rational Data Architect” (developerWorks, Dec. 2006) describes how to create schema mappings semi-automatically.
- “Rational Data Architect skills series, Part 2: Generate SQL/XML queries with Rational Data Architect” (developerWorks, Sep. 2006) describes how to transform data from relational data sources into XML format.
- “Rational Data Architect skills series, Part 1: Access and integrate enterprise metadata with Rational Data Architect” (developerWorks, Jul. 2006) describes how to create a unified view across heterogeneous data sources.
Comments
Comment by Edward de Leau on 2008-02-07 04:53:57 +0000
Great stuff, i was planning to do this but before i started i googled on it and found this. I’m going to try this also this weekend (i think), thanks for the great tutorial.
Comment by Edward de Leau on 2008-02-07 04:57:23 +0000
The fun thing will be that both RDA and WordPress have new versions!
